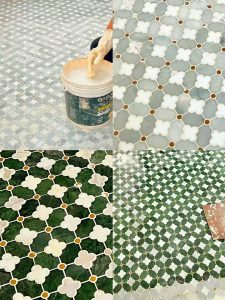
Marble mosaic tiles, with their unique beauty and exquisite textures, have become the first choice for many home and commercial space decorations. Still, installing marble mosaic tiles is more than just putting them orderly on the wall or floor. Usually, the success or failure of the ultimate result depends on the grouting process critical stage. Grouting is about freezing the beauty of mosaic tiles and making them shine in the future, not only about filling in the gaps—just as with creating a great work of art. Today, we will explore the entire process of grouting marble mosaic tiles, from tool preparation to post-cleaning, to unveil the mystery of this craft.

Marble Mosaic Tile Grout
Before grouting, a must-have list for tool preparation
To successfully complete the grouting of marble mosaic tiles, you first need to prepare a series of tools and materials. These are some fundamental instruments absolutely essential throughout the grouting process:
1.Grouting scraper: used to apply grouting material evenly to the surface of the tile to ensure that each gap is fully filled.
2.Sponge: used to wipe off excess grouting material to keep the surface of the tile smooth.
3.Grouting material: It is particularly important to choose a grouting material suitable for marble tiles. Using non-sanded mortar will help you to prevent marble surface damage.
4. Tape: Used to protect areas that do not need grouting and prevent grouting materials from contaminating surrounding surfaces.
5. Bucket and agitator: Used to mix grouting materials to achieve the desired consistency.
6. Clean water: Essential for cleaning tools and tile surfaces after grouting.
Preparation before grouting: Make sure everything is ready
Before you start grouting, there are several preparations that must be done to ensure that the grouting process goes smoothly and the results are ideal.
1. Clean the tile surface:
The surface of the marble mosaic tile must be clean and free of dust, trash or other contaminants before grouting. This guarantees not only the grouting material’s adhesion but also prevents issues with unequal color or contaminants following grouting. Using a damp cloth or vacuum cleaner, thoroughly clean the surface; then, wait for it to dry totally.
2. Protect surrounding areas:
Cover and guard corners, edges, and joints—places that don’t call for grouting—using tape. This prevents the grout from spreading to unnecessary areas and reduces subsequent cleaning work.
3. Mix the grout:
Follow the instructions on the grout packaging and mix it with clean water until it becomes a uniform, particle-free paste. Check that the grout has a reasonable consistency. While too thick a substance will compromise the smoothness of the building, too thin a material may not cover the gaps. Usually, the grout should have easily applied and penetrating toothpaste-like feel.
Grouting process: a combination of art and technology
Grouting is the crucial stage once the basic preparations are finished. This process requires a certain amount of skill and patience to ensure that every gap is evenly filled without damaging the marble surface.
1. Apply the grout:
Use a grout scraper to evenly apply the mixed grout on the marble mosaic tile. Applying force equally will help to guarantee that every gap is totally filled. Usually advised to keep the scraper at an angle of roughly 45 degrees to the tile surface, this will efficiently fill the gaps without waste of too much material.
2. Remove excess grout:
Immediately after applying, use a damp sponge to gently wipe the surface of the tile to remove excess grout. This stage is crucial since after the grout hardens, removal will prove challenging. When cleaning, be careful not to remove anything from the gaps but rather remove extra material on the surface.
3. Trim edges and joints:
Use a grout scraper or tiny needle to cut the edges and joints so that every gap is filled and level even while the grout is still wet. This stage influences not only the looks but also the tile’s long-term usage.

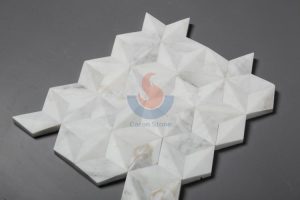
Calacatta Gold Marble Mosaic,Oriental White Marble Mosaic Tiles
Cleaning and maintenance after grouting: Keep it shiny as new
After grouting, the next step is cleaning and maintenance, which directly affects the final presentation of the marble mosaic tile.
1. Remove surface residue:
Once the grout is just dry but still wet, carefully wash the tile’s surface once more with a moist sponge to eliminate any last grout residue. At this time, you should pay special attention not to use too much force to avoid affecting the already filled gaps.
2. Polishing of the tile surface:
After the grouting material is completely dry, you can use a dry cloth or fine sandpaper to lightly polish the marble surface. Along with eliminating the remaining residue, this will bring the marble back to its natural brilliance and smoothness.
3. Regular maintenance:
In order to maintain the beauty and service life of marble mosaic tiles, it is recommended to clean and maintain them regularly. To prevent marble surface corrosion, stay away from strong alkaline or acid cleansers. Choose a special marble curing agent and care for the tiles every few months to effectively extend their service life.
Common problems and solutions during grouting
You could still run across some typical grouting issues even with great preparation. Knowing these issues and learning the fixes will enable you to be more useful during the building process.
1. Uneven grouting materials:
If you find that the grouting material still has particles or lumps after stirring, it may be that the ratio of water to material is incorrect or the stirring is insufficient. Reading the material directions will help you to adjust the water ratio; next, use an electric mixer to thoroughly swirl until it is homogeneous.
2. There is residue on the surface of the tile after grouting:
Use a special cleaner or fine sandpaper to carefully polish the surface to eliminate the residue if the surface of the tile is not cleaned in time following grouting, thus the grouting material dries on the tile. Use sparing force to prevent marbling from being scratched.
3. The gap is not filled fully:
A tiny amount of grouting material can be re-adjusted to complement should some gaps prove to be incomplete following grouting. To guarantee that the new grouting material mixes with the old material, fill the space and compact it using a scraper.

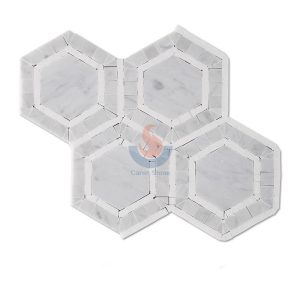
Carrara White And Greece Thassos White Marble Hexagon Floor Mosaic Tiles
Grouting marble mosaic tiles is a job that requires patience and skills, but once you master the correct methods and steps, you can make your home decoration shine like never before. Whether it’s placed in the bathroom, kitchen, or as a creative accent in the living room, the grouting quality determines the tile’s endurance and attractiveness directly. Therefore, during the grouting process, careful handling of every detail can add a lasting beauty and luxury to your home.
People also ask:
How to Cut Marble Mosaic Tiles Without Chipping?
Make a little notch in the tile using your saw to guide your cut before cutting it whole. This will apply less pressure while beginning the first cut, therefore helping to avoid the tile from cracking.


