


Imagine that your home is about to be transformed into a dazzling stage, and mosaic marble floor tiles are the shining gems, making every corner exude unique charm. This is a performance, an artwork exhibition, not only decoration. Are you in readiness? Let’s open the door to this home dress-up show together and let every inch of the home be full of stories.
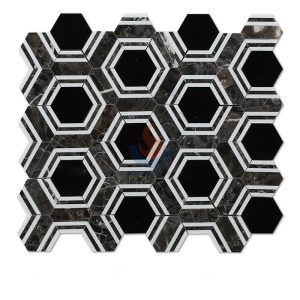
Brown Marble Hexagon Mosaic Tiles
The charm of mosaic marble floor tiles
Why choose mosaic marble floor tiles? It is an art and a life attitude, not only a substance. Each floor tile has a unique texture, as if telling an ancient legend. Whether it is modern simplicity or classical luxury, they can present a different style and be absolutely incorporated into any type of house decoration. Moreover, the durability of marble ensures that these floor tiles can stand the test of time, so that your home will still shine in the long river of time.
Preparation before installation
Before the floor tiles shine, we need to do adequate preparation. Like setting the stage for a spectacular event, first ensure the ground is level and tidy. Floor tile laying influence is strongly related to ground flatness. Uneven ground may cause uneven laying of floor tiles and even cause cracks. Prepare all equipment and materials—including spatulas, levels, glue, hammers, gap fillers, etc.—also. These tools are like your dance partners, helping you to dance the most elegant steps in this decoration dance.
Planning and measuring the size of the room
Planning and measurement are quite important phases before official laying. First, accurate measurements should be made according to the size of the room to determine the arrangement and cutting requirements of the floor tiles. Every floor tile has a place and purpose, much like in choreographing a dance. First “dry lay” on the ground, that is, without adhesives, just arrange the floor tiles on the ground as advised to validate the arrangement effect and help to make the final result more attractive. This process is full of fun and creativity, allowing you to foresee the final gorgeous effect in the planning.
Cutting mosaic marble floor tiles
Cutting marble floor tiles is a step that requires delicate operation. Professional cutting instruments, such wet cutters, are needed during the cutting process to guarantee accuracy of the cutting as marble is hard. This process is like performing a delicate surgery, and every cut needs to be precise. Wear gloves and eyewear throughout the cutting operation to prevent flying debris-induced injuries. This is not only for safety, but also to allow you to concentrate on completing this artistic creation.
Pasting mosaic marble floor tiles
After the cutting is completed and the layout is confirmed to be correct, you can start pasting the floor tiles. This procedure is like dressing for the floor tiles in exact fit. First, evenly apply a thin layer of tile adhesive on the ground, scrape it flat and form stripes with a spatula. This helps to improve the adhesion of the floor tiles. To guarantee that the mosaic marble floor tiles fit tightly, then softly press them onto the glue and tap it with a hammer. This process requires patience and meticulousness, and each floor tile must be ensured to fit perfectly without leaving any gaps.
Caulking and cleaning: Keep the stage clean
After the floor tiles are laid, wait for the adhesive to dry completely, which usually takes about 24 hours. You still have to caulk. Select a gap filler that complements the floor tiles’ color, then equally apply the caulk between them with a rubber spatula. This process is like drawing perfect lines for the gaps between the floor tiles, making them more harmonious and unified. To get extra caulk off the floor tiles once the caulking is finished, softly wash their surface with a moist sponge. This process requires care and patience to ensure that each floor tile is kept clean and shows the best luster.
Final Cleaning and Maintenance
After the caulk is completely dry, you can do the final cleaning. Using a fresh rag, wipe the floor tiles’ surface from dust and residue. If there are stubborn stains, you can use a special marble cleaner. This process is like a final curtain call for the show, ensuring that each floor tile is presented to the audience in the best condition. After the cleaning is completed, your mosaic marble floor tiles will show their unique luster and beauty, making your home a dazzling stage.
Precautions
During the installation process, there are several important precautions that need special attention. First, make sure to use the right amount of adhesive. The stability of the floor tiles will change depending on too much or too little. Second, never overlook the cautions step. Caulking not only enhances the integrity of the floor tiles, but also prevents water from seeping into the gaps and prolongs the service life of the floor tiles. Finally, marble floor tiles are relatively fragile, so be careful when installing and cleaning to avoid collisions and scratches. These precautions are like behind-the-scenes tips for this show, helping you ensure that everything goes smoothly.
FAQ
In actual operation, you may encounter some common problems. For instance, how would one handle the issue of floor tile cutting not all equally? Or, how to adjust the uneven floor tiles after laying? These problems can be solved with careful operation and appropriate tools. Uneven floor tiles after laying can be moved before the glue sets, or tapped with a rubber hammer to make them flat; sandpaper or a polisher can be used for fine corrections when the cutting is uneven. The answers to these common questions are like improvisations in this show, allowing you to calmly deal with unexpected situations.

Black and white marble inlay brass art tree and flower design mosaic tile
Installing mosaic marble floor tiles is a task that requires patience and skills, but all the efforts are worth it when you see the final effect. With careful preparation, the right steps, and meticulous finishing touches, you can create a floor space that is both beautiful and functional. Marble tiles’ unusual texture and mosaic workmanship will give your house a little of ageless beauty. Now, let’s work together to make your home a fashion benchmark in the neighborhood, so that everyone who steps into this space can feel its extraordinary charm.
People also search for:
Why do marble mosaic tiles need to be sealed?
You may ask, why bother to seal marble mosaic tiles? To put it bluntly, marble is a natural stone. Although it is hard, it has many pores on its surface and is highly absorbent. Especially for tiles like mosaics that are made up of small pieces, the gaps between the joints are easy for dirt to hide. Humid environments such as kitchens and bathrooms are their “Waterloo”. Water stains and oil stains will penetrate through these small pores. Over time, the tiles will become dull and may even mold and discolor. Therefore, sealing marble mosaic tiles is a key step to prevent these problems. In this article “Save the tiles! A step-by-step guide to sealing marble mosaics“, I will share my experience in sealing.